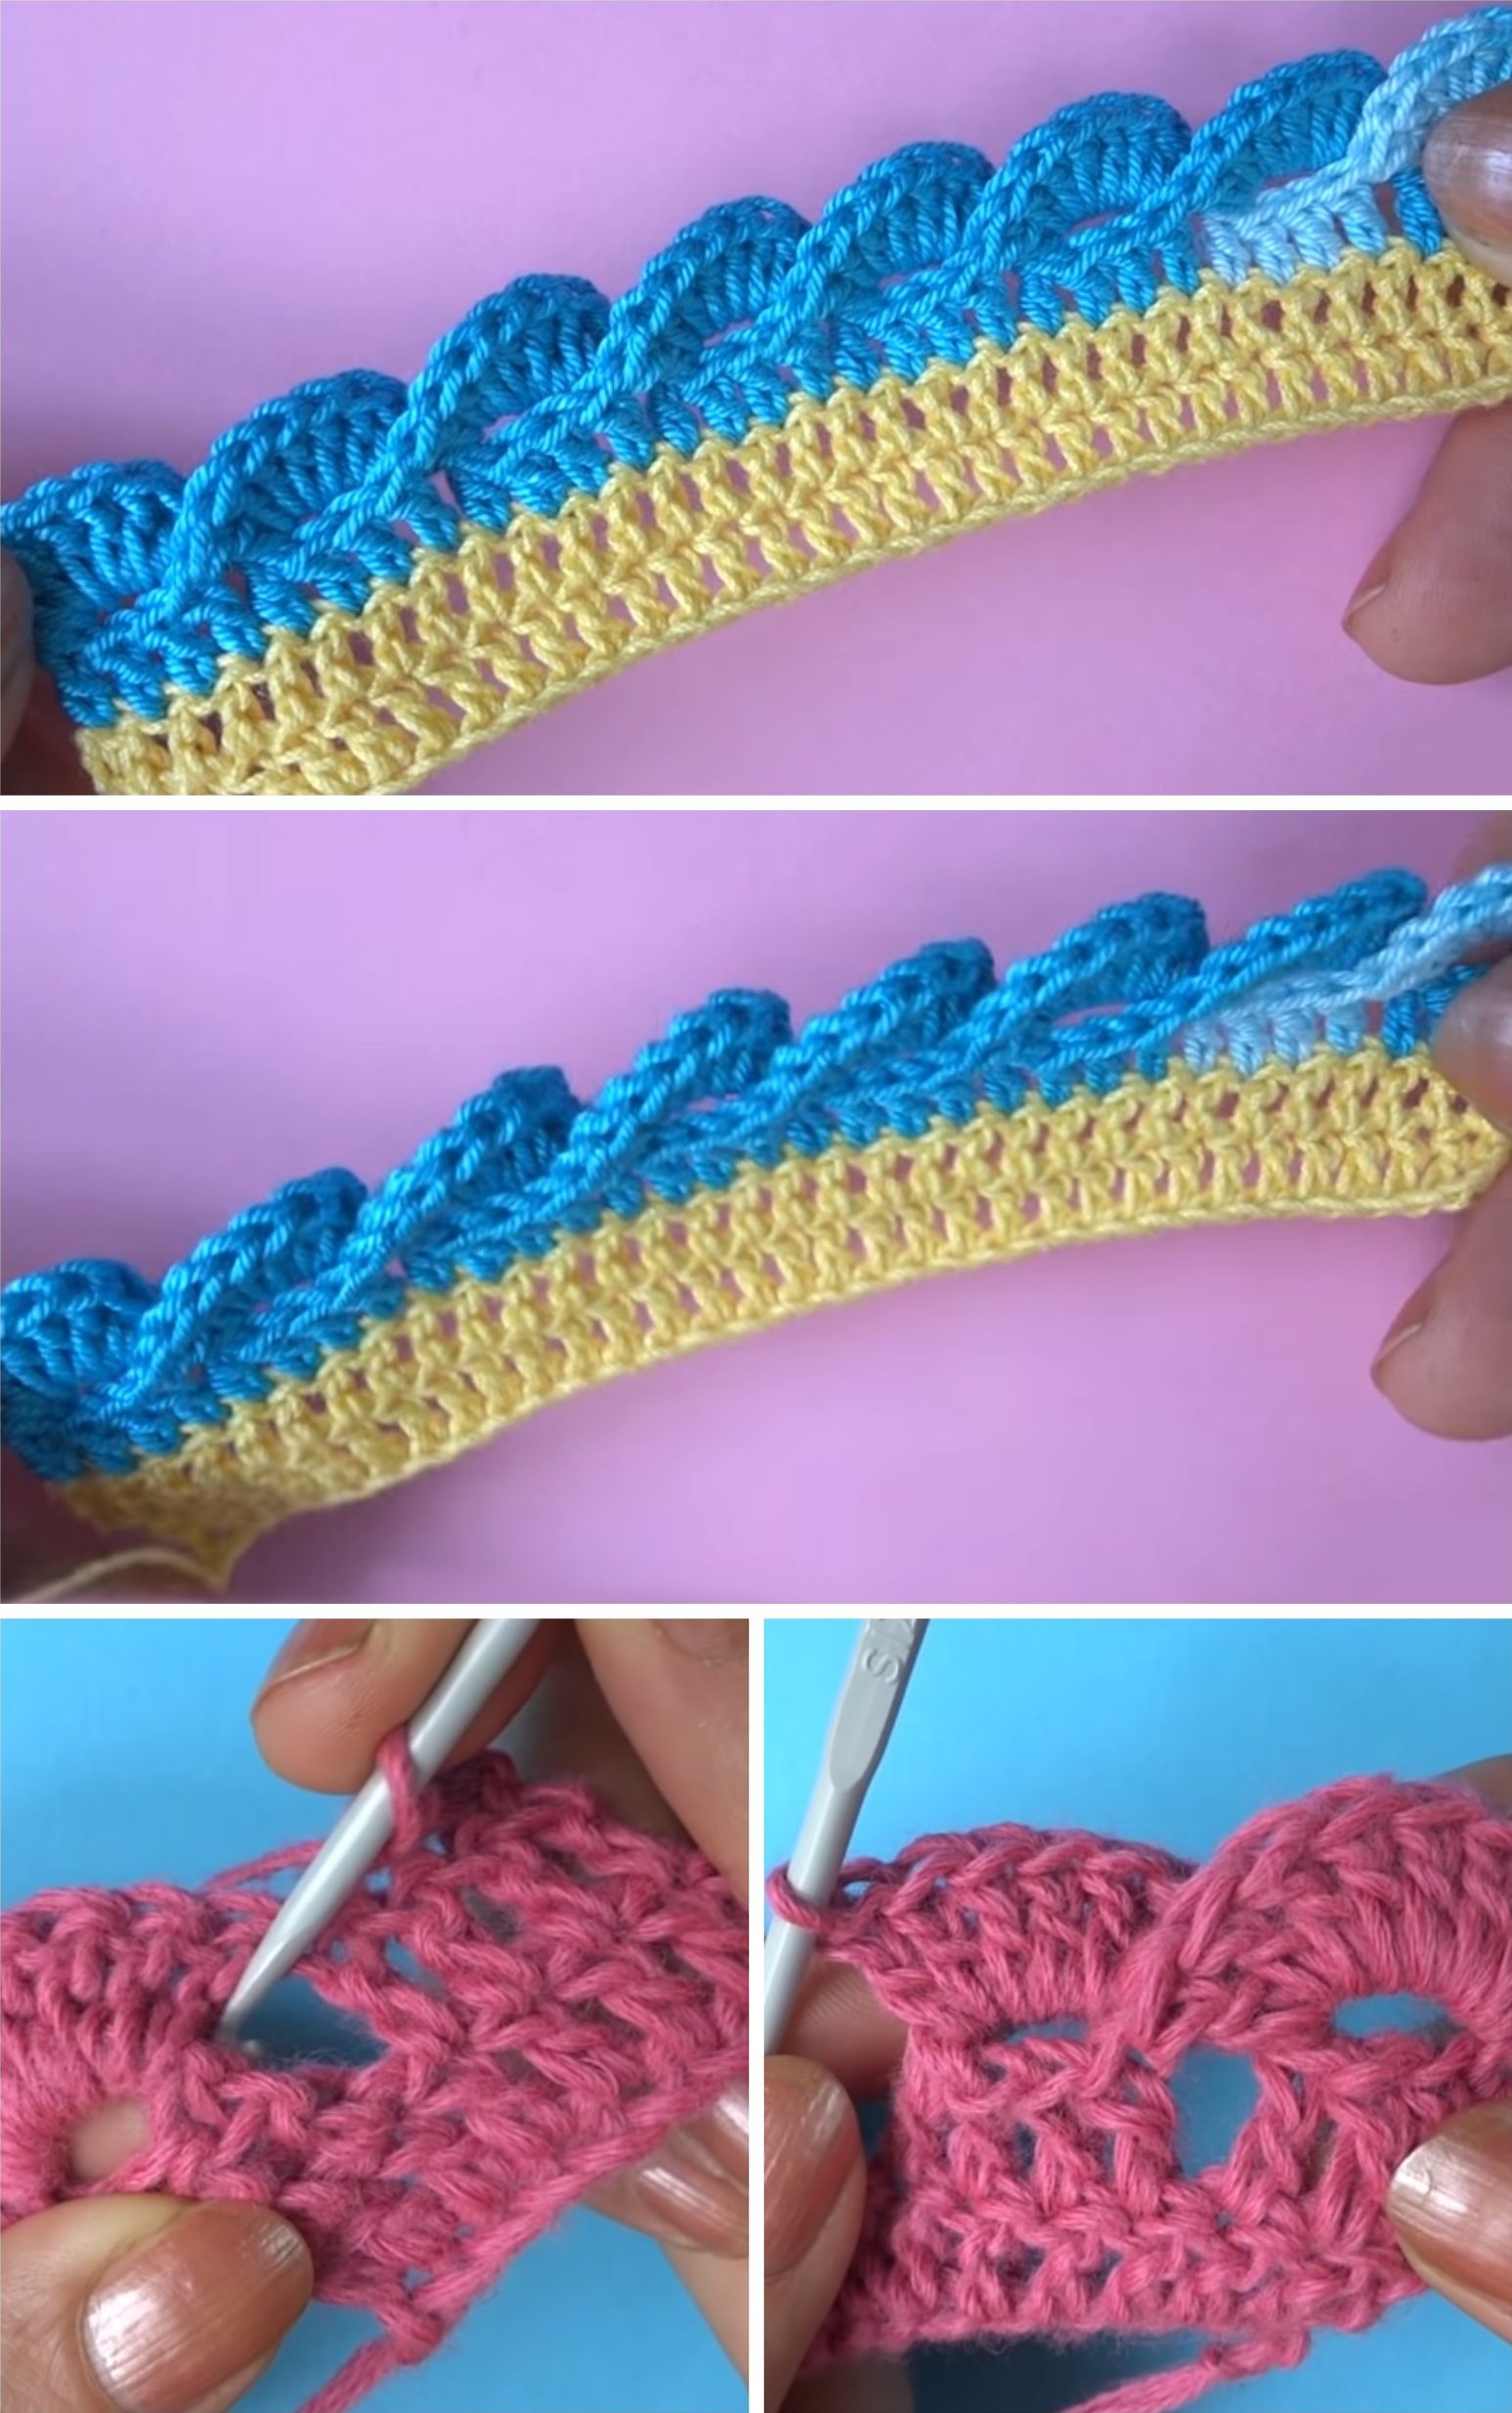
Crochet Envelope Border
Crochet Envelope Border - The preferred method for starting an envelope border is usually a round of slip stitches, but this can be quite fiddly and time consuming, so i formulated a. To learn this technique the best way, it’s ideal if you crochet a small mosaic crochet project first. Now crochet the envelope border all around. The pattern is worked in rounds. Crochet corner to corner border; Web the double (envelope) border is used for the overlay mosaic crochet to hide the tails. Have you ever finished an overlay mosaic crochet project and been left staring at all those loose ends, wondering what. Web once you do the first revolution around, the rest of the border is set and ready for you to do as many rounds as your heart desires. It is easiest to start on the top or bottom (away from the tails). Web the purpose of the envelope border is to cover up all those pesky ends without having to weave them in. Maybe a coaster would be ideal. How to add an envelope border stitch. Web you work a border on the back side, then a border on the front side, and seam them together, ensuring all ends are enclosed inside. Overlay mosaic crochet swatch materials. Chain 2 to create corner. Web that works weel for making a border with an interwoven crochet project, because the two layers of filet crochet are worked through each other and you wokr with chains in between dc’s, but here you just cannot(!!!) do that! Put your hook into the stitch (going under 2 loops, like a normal stitch). Crochet slip stitches loosely all around the edges evenly. Crochet corner to corner border; The border is worked from front and back sides of your project and closes by working the last row through the loops of stitches of both borders to close it leaving the tails in between both border sides. 20 sts on each edge (1 of those 20 is in the corner). Web during the last row (r32) crochet through all 3 loops. To learn this technique the best way, it’s ideal if you crochet a small mosaic crochet project first. Web this is the third lesson in my beginners guide to the mosaic crochet technique, which is a. Have you ever finished an overlay mosaic crochet project and been left staring at all those loose ends, wondering what. Web learn how to crochet the envelope border for overlay mosaic crochet project to hide your yarn ends and prevent having to weave them in.written tutorial: How to add an envelope border stitch. Pick up your yarn and pull through.. Web this mosaic crochet tutorial pulls together my favorite techniques to create a double (envelope) border to hide all the ends of the rows when crocheting in t. Web the concept of the envelope border is not an original one, and i have adapted several border concepts to come up with this pattern. I adjusted the pattern so that it. Say goodbye to weaving ends in your overlay mosaic crochet projects! Web the envelope or double border is fast becoming a favourite method for finishing an overlay mosaic crochet blanket, as it is so neat and elegant and doesn’t curl up at the edges like a normal border can. Remember that if you will do that at the top and. I adjusted the pattern so that it worked for multiples of 3, but you can vary. Web the purpose of the envelope border is to cover up all those pesky ends without having to weave them in. Pick up your yarn and pull through. Overlay mosaic crochet swatch materials. Web the preferred method for starting an envelope border is usually. Small portion of worsted weight yarn in 2 colors or whatever you’d like to work your swatch up in. The border is worked from front and back sides of your project and closes by working the last row through the loops of stitches of both borders to close it leaving the tails in between both border sides. By erin toews. Web mastering the envelope border: Web the concept of the envelope border is not an original one, and i have adapted several border concepts to come up with this pattern. Web that works weel for making a border with an interwoven crochet project, because the two layers of filet crochet are worked through each other and you wokr with chains. Chain 1, single crochet back loop only in same stitch as join, single crochet back loop only in each single crochet across. Remember that if you will do that at the top and bottom, you will be working smaller all of the sudden! Web the purpose of the envelope border is to cover up all those pesky ends without having. Web this is the lazy way i add an envelope border to my mosaic crochet projects.to view the pdf: I used this border for my pumpkin potholder. Web the double (envelope) border is used for the overlay mosaic crochet to hide the tails. To learn this technique the best way, it’s ideal if you crochet a small mosaic crochet project. Web the purpose of the envelope border is to cover up all those pesky ends without having to weave them in. Web during the last row (r32) crochet through all 3 loops. Web the preferred method for starting an envelope border is usually a round of slip stitches, but this can be quite fiddly and time consuming,. I adjusted the. Chain 1, single crochet back loop only in same stitch as join, single crochet back loop only in each single crochet across. This pattern includes instructions for two quick and easy border designs, which can be added to any mosaic crochet blanket, including inset mosaic. Web this is the third lesson in my beginners guide to the mosaic crochet technique, which is a very simple but effective crochet technique with lots of possibili. Crochet a simple envelope border. To learn this technique the best way, it’s ideal if you crochet a small mosaic crochet project first. Click here for a video tutorial of an envelope border. Web in this video you'll learn how to start an envelope border which will hide all those pesky ends that any overlay mosaic crochet project leaves you with.this. Pick up your yarn and pull through. I used this border for my pumpkin potholder. Web once you do the first revolution around, the rest of the border is set and ready for you to do as many rounds as your heart desires. Crochet slip stitches loosely all around the edges evenly. Web that works weel for making a border with an interwoven crochet project, because the two layers of filet crochet are worked through each other and you wokr with chains in between dc’s, but here you just cannot(!!!) do that! Now crochet the envelope border all around. 20 sts on each edge (1 of those 20 is in the corner). Web during the last row (r32) crochet through all 3 loops. Dc envelope border page 2 of 3 envelope border technique step 1 surface slip stitch all the way around.
Envelope Border with FPDC Crochet Tutorial Overlay Mosaic Crochet

How to Crochet Envelope Border Tutorial for Mosaic Crochet Nicki's
Crochet Border

Envelope Border (Double Border) free tutorial for overlay mosaic

Ravelry Easy Envelope Borders pattern by Rosina Plane

Mosaic Crochet Ends & ENVELOPE BORDER Bella Coco Crochet

How to Crochet Envelope Border Tutorial for Mosaic Crochet Nicki's

Easy Envelope Borders pattern by Rosina Plane Crochet border patterns

Easy Envelope Border Quick Start Method YouTube

Envelope Border for Mosaic Crochet, Ashlee's lazy way YouTube
Overlay Mosaic Crochet Swatch Materials.
By Erin Toews June 27, 2024 June 27, 2024.
It Is Easiest To Start On The Top Or Bottom (Away From The Tails).
Web You Can Do Any Stitch For The Envelope Border As Long As You Start With Either A Row Of Sl St Or Sc, And Then Close The 2 Sides Of The Border.
Related Post: